一、Dubbo和zk的作用
上回讲到,Dubbo作为一款优秀的RPC框架,封装了dubbo-provider(提供者)和dubbo-consumer(消费者),而provider和consumer之间需要通过注册中心来作为可发现的服务目录。而zookeeper(此处简称zk)提供了服务接口注册和分配的功能。让我们看下百度上是怎么解释zk的
ZooKeeper是一个分布式的,开放源码的分布式应用程序协调服务,它是一个为分布式应用提供一致性服务的软件,提供的功能包括:配置维护、域名服务、分布式同步、组服务等,ZooKeeper的目标就是封装好复杂易出错的关键服务,将简单易用的接口和性能高效、功能稳定的系统提供给用户。
我们使用zk和dubbo结合,可以建立zk集群,以及多个服务提供者来完成高并发应用系统的承载,这也是dubbo+zk在近几年分布式架构上比较流行的原因。
二、搭建流程
1.工程搭建采用maven搭建,此文用到了maven多模块(后期讲解什么是maven多模块,会的朋友请忽略),先来看下工程目录结构
SpringBootDubbo(父工程)
–dubbo-Serivce(服务提供者工程)
–dubbo-Serivce(服务提供者工程)
/src/main/java
–com.yang.boot 启动类
–com.yang.service 服务接口 也是dubbo暴露服务接口
–com.yang.service.impl 服务实现
/src/main/resource
–application.properties 全局配置文件
–dubbo-Web(服务消费者工程)
/src/main/java
–com.yang.boot 启动类
–com.yang.service 服务接口 也是dubbo消费服务接口
–com.yang.control web层访问配置控制器
/src/main/resource
–application.properties 全局配置文件
建立服务提供者
2.建立服务提供者工程dubbo-Serivce,pom文件配置如下
1
2
3
4
5
6
7
8
9
10
11
12
13
14
15
16
17
18
19
20
21
22
23
24
25
26
27
28
29
30
31
32
33
34
35
36
37
38
39
40
41
42
43
44
45
46
| <project xmlns="http://maven.apache.org/POM/4.0.0" xmlns:xsi="http://www.w3.org/2001/XMLSchema-instance"
xsi:schemaLocation="http://maven.apache.org/POM/4.0.0 http://maven.apache.org/xsd/maven-4.0.0.xsd">
<modelVersion>4.0.0</modelVersion>
<parent>
<groupId>org.springframework.boot</groupId>
<artifactId>spring-boot-starter-parent</artifactId>
<version>1.5.2.RELEASE</version>
</parent>
<artifactId>dubbo-Serivce</artifactId>
<properties>
<project.build.sourceEncoding>UTF-8</project.build.sourceEncoding>
<dubbo-spring-boot>1.0.0</dubbo-spring-boot>
</properties>
<dependencies>
<dependency>
<groupId>io.dubbo.springboot</groupId>
<artifactId>spring-boot-starter-dubbo</artifactId>
<version>${dubbo-spring-boot}</version>
</dependency>
<dependency>
<groupId>org.springframework.boot</groupId>
<artifactId>spring-boot-starter-web</artifactId>
</dependency>
<dependency>
<groupId>org.springframework.boot</groupId>
<artifactId>spring-boot-starter-test</artifactId>
<scope>test</scope>
</dependency>
<dependency>
<groupId>junit</groupId>
<artifactId>junit</artifactId>
<version>4.12</version>
</dependency>
</dependencies>
</project>
|
3.dubbo-Serivce项目全局配置文件如下
1
2
3
4
5
6
7
8
9
| ## 服务提供者启动端口
server.port=8081
## Dubbo 服务提供者配置
spring.dubbo.application.name=provider
spring.dubbo.registry.address=zookeeper://127.0.0.1:2181
spring.dubbo.protocol.name=dubbo
spring.dubbo.protocol.port=20880
spring.dubbo.scan=com.yang.service
|
3.在com.yang.service建立服务接口类HelloService
1
2
3
4
5
6
7
8
9
10
11
12
13
14
15
| package com.yang.service;
public interface HelloService {
public String sayHello(String name);
}
|
4.在com.yang.service.impl建立服务接口实现类HelloServiceImpl
1
2
3
4
5
6
7
8
9
10
11
12
13
14
15
16
17
18
19
20
21
| package com.yang.service.impl;
import com.alibaba.dubbo.config.annotation.Service;
import com.yang.service.HelloService;
@Service
public class HelloServiceImpl implements HelloService{
public String sayHello(String name) {
return "你好"+name;
}
}
|
5.在com.yang.boot下建立项目启动类StartServiceApplication
1
2
3
4
5
6
7
8
9
10
11
12
13
14
15
| package com.yang.boot;
import org.springframework.boot.SpringApplication;
import org.springframework.boot.autoconfigure.EnableAutoConfiguration;
import org.springframework.boot.autoconfigure.SpringBootApplication;
import org.springframework.context.annotation.ComponentScan;
@SpringBootApplication
@EnableAutoConfiguration
@ComponentScan("com.yang")
public class StartServiceApplication {
public static void main(String[] args) {
SpringApplication.run(StartServiceApplication.class, args);
}
}
|
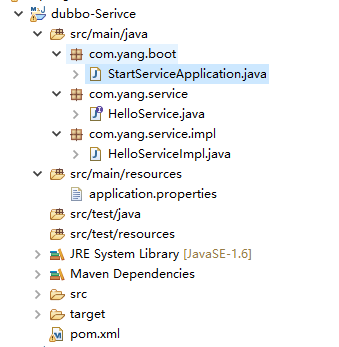
6.建立好的项目结构如下
建立服务消费者
7.建立服务消费者工程dubbo-Web,pom文件配置如下
1
2
3
4
5
6
7
8
9
10
11
12
13
14
15
16
17
18
19
20
21
22
23
24
25
26
27
28
29
30
31
32
33
34
35
36
37
38
39
40
41
42
43
44
45
46
47
48
49
50
| <?xml version="1.0"?>
<project xsi:schemaLocation="http://maven.apache.org/POM/4.0.0 http://maven.apache.org/xsd/maven-4.0.0.xsd" xmlns="http://maven.apache.org/POM/4.0.0"
xmlns:xsi="http://www.w3.org/2001/XMLSchema-instance">
<modelVersion>4.0.0</modelVersion>
<parent>
<groupId>org.springframework.boot</groupId>
<artifactId>spring-boot-starter-parent</artifactId>
<version>1.5.2.RELEASE</version>
</parent>
<groupId>com.yang.study</groupId>
<artifactId>dubbo-Web</artifactId>
<version>0.0.1-SNAPSHOT</version>
<name>dubbo-Web</name>
<url>http://maven.apache.org</url>
<properties>
<project.build.sourceEncoding>UTF-8</project.build.sourceEncoding>
<dubbo-spring-boot>1.0.0</dubbo-spring-boot>
</properties>
<dependencies>
<dependency>
<groupId>io.dubbo.springboot</groupId>
<artifactId>spring-boot-starter-dubbo</artifactId>
<version>${dubbo-spring-boot}</version>
</dependency>
<dependency>
<groupId>org.springframework.boot</groupId>
<artifactId>spring-boot-starter-web</artifactId>
</dependency>
<dependency>
<groupId>org.springframework.boot</groupId>
<artifactId>spring-boot-starter-test</artifactId>
<scope>test</scope>
</dependency>
<dependency>
<groupId>junit</groupId>
<artifactId>junit</artifactId>
<version>4.12</version>
</dependency>
</dependencies>
</project>
|
8.服务消费者工程全局配置文件内容如下
1
2
3
4
5
6
7
| ## 服务消费者启动端口
server.port=8082
## Dubbo 服务消费者配置
spring.dubbo.application.name=consumer
spring.dubbo.registry.address=zookeeper://127.0.0.1:2181
spring.dubbo.scan=com.yang
|
9.在消费者工程com.yang.service建立与提供者服务相同的服务接口与抽象方法
1
2
3
4
5
6
7
8
9
10
11
12
13
14
15
| package com.yang.service;
public interface HelloService {
public String sayHello(String name);
}
|
10.在消费者工程com.yang.control建立用户访问入口
1
2
3
4
5
6
7
8
9
10
11
12
13
14
15
16
17
18
19
20
21
22
23
24
25
26
27
28
| package com.yang.control;
import org.springframework.web.bind.annotation.RequestMapping;
import org.springframework.web.bind.annotation.RequestParam;
import org.springframework.web.bind.annotation.RestController;
import com.alibaba.dubbo.config.annotation.Reference;
import com.yang.service.HelloService;
@RestController
public class HelloController {
@Reference
private HelloService helloService;
@RequestMapping("/hello")
public String helloWorld(@RequestParam("name") String name){
return helloService.sayHello(name);
}
}
|
11.在消费者工程com.yang.boot建立消费者工程启动类
1
2
3
4
5
6
7
8
9
10
11
12
13
14
15
16
17
18
19
20
21
22
23
24
25
26
27
28
| package com.yang.control;
import org.springframework.web.bind.annotation.RequestMapping;
import org.springframework.web.bind.annotation.RequestParam;
import org.springframework.web.bind.annotation.RestController;
import com.alibaba.dubbo.config.annotation.Reference;
import com.yang.service.HelloService;
@RestController
public class HelloController {
@Reference
private HelloService helloService;
@RequestMapping("/hello")
public String helloWorld(@RequestParam("name") String name){
return helloService.sayHello(name);
}
}
|
配置zookeeper
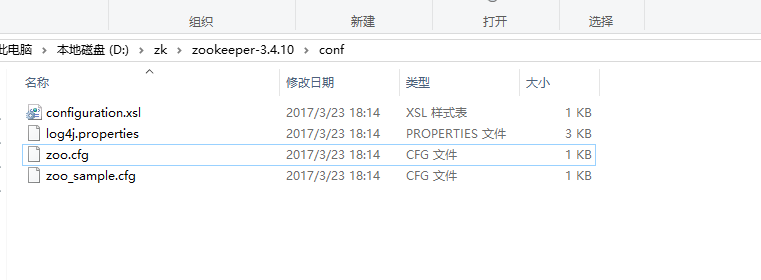
12.下载zookper到本地,点击我下载,小心你的鼠标,进行解压,将zk/conf目录下的zoo_sample.cfg文件拷贝一份,并命名为zoo.cfg,结构如下
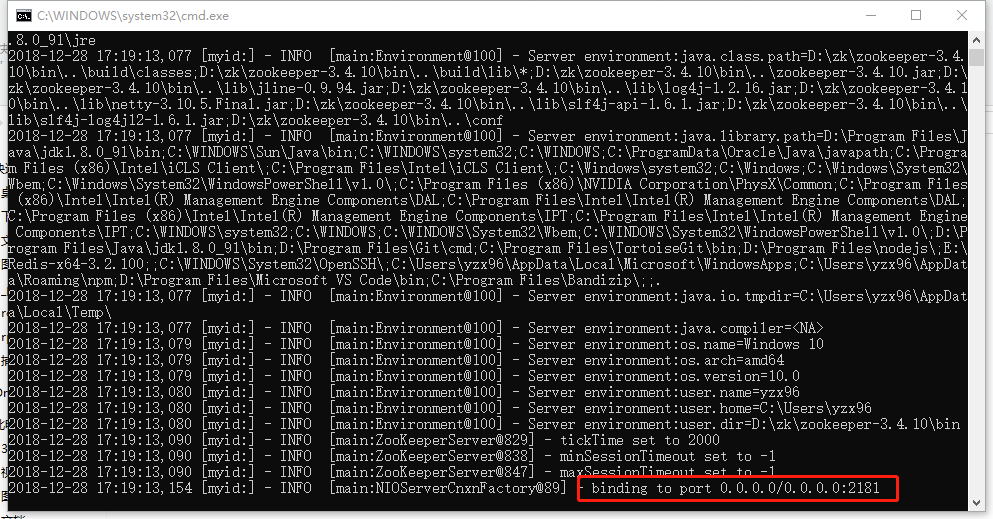
13.在zk/bin路径下找到zkServer.cmd,双击启动,启动成功日志如下
启动服务提供者
14.在服务提供者工程运行程序StartServiceApplication,启动成功如下
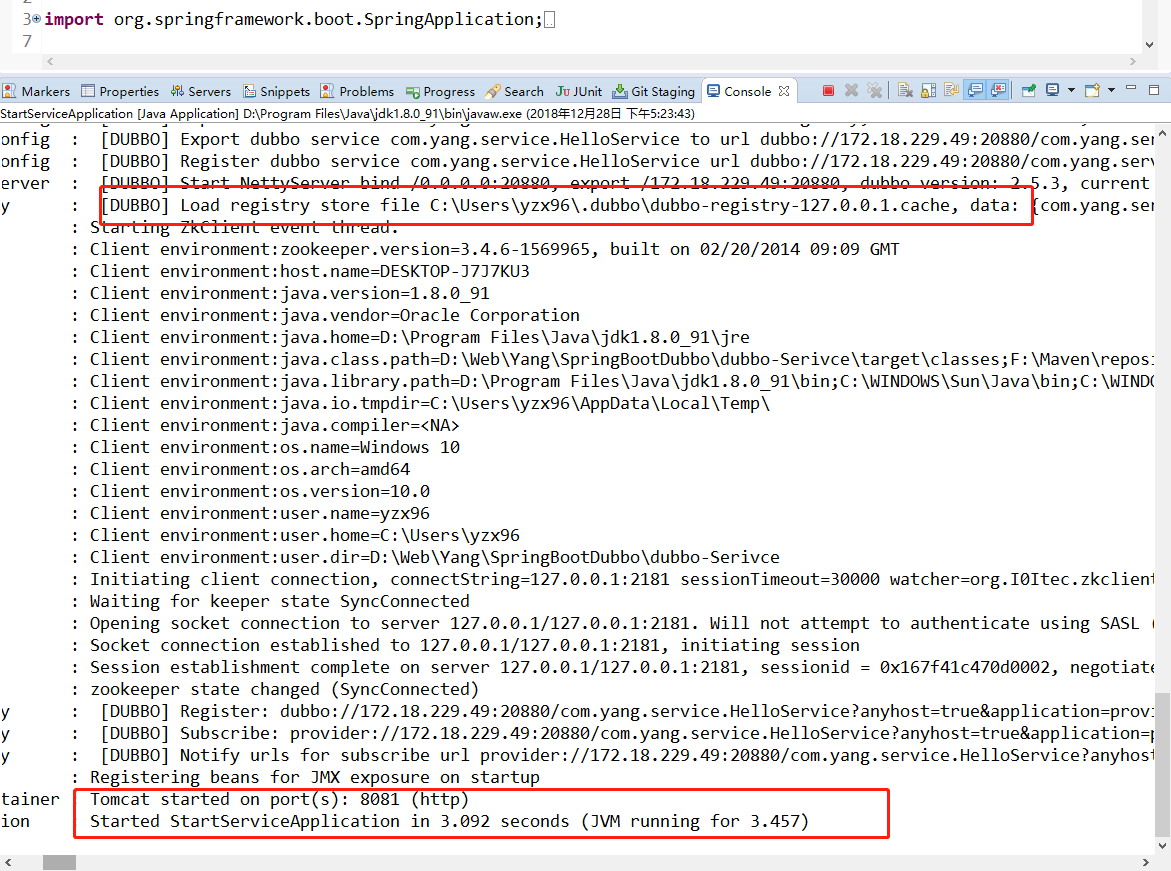
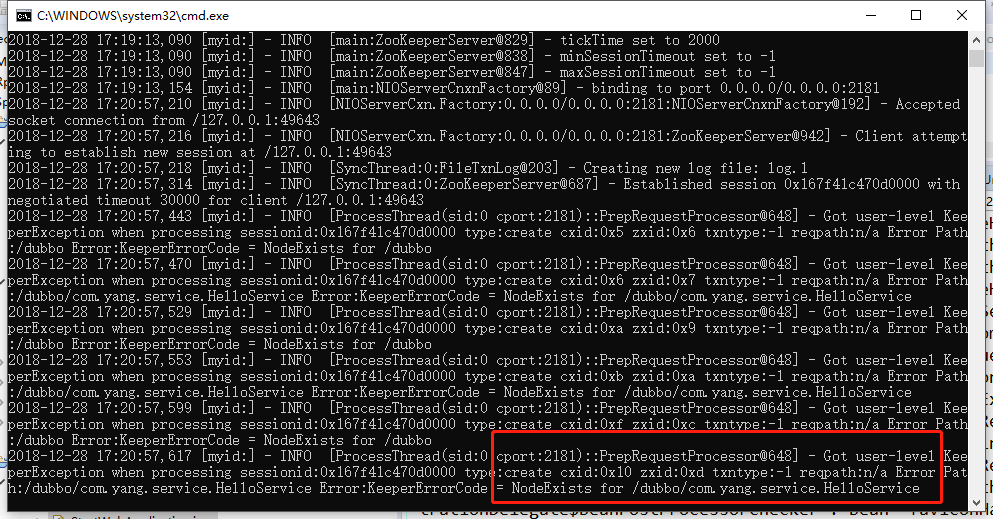
15.服务会注册到zk上,zk也会有日志打印
启动服务消费者
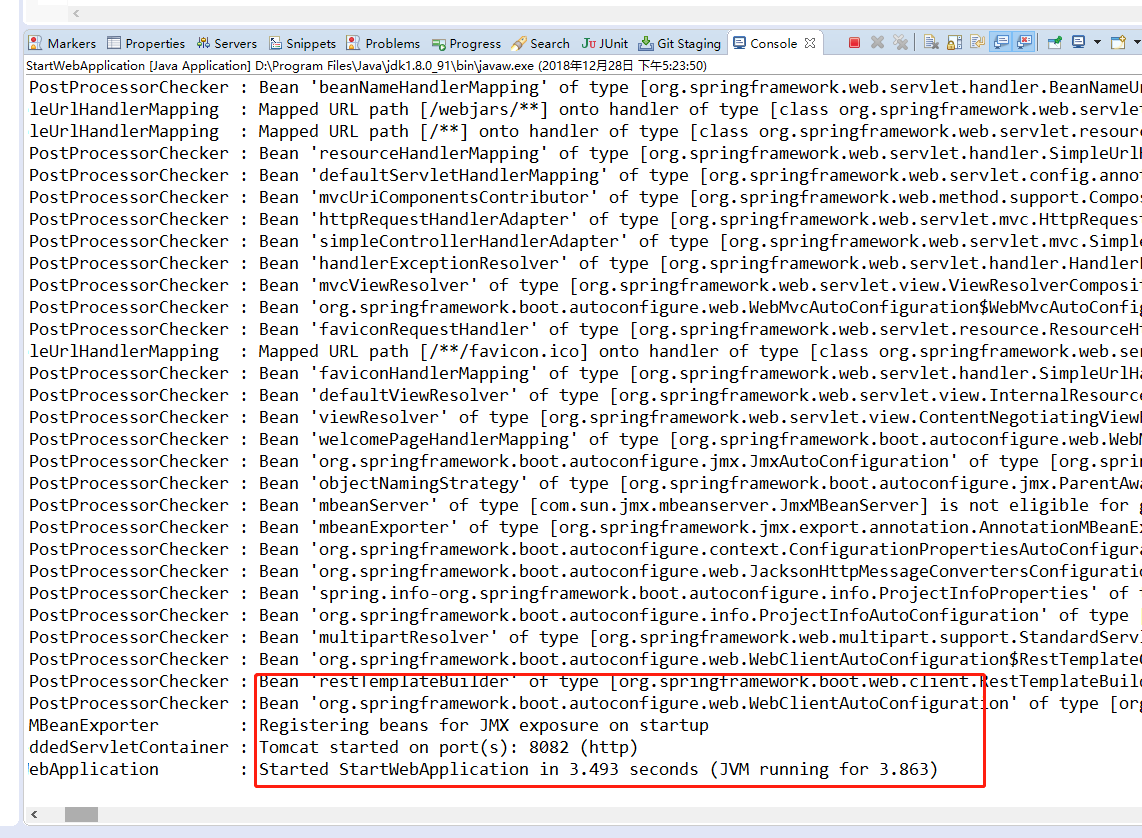
16.在服务消费者工程运行程序StartWebApplication,启动成功如下
查看zk上的数据
17.在zk/bin路径下找到zkCli.cmd,双击启动,启动成功日志如下
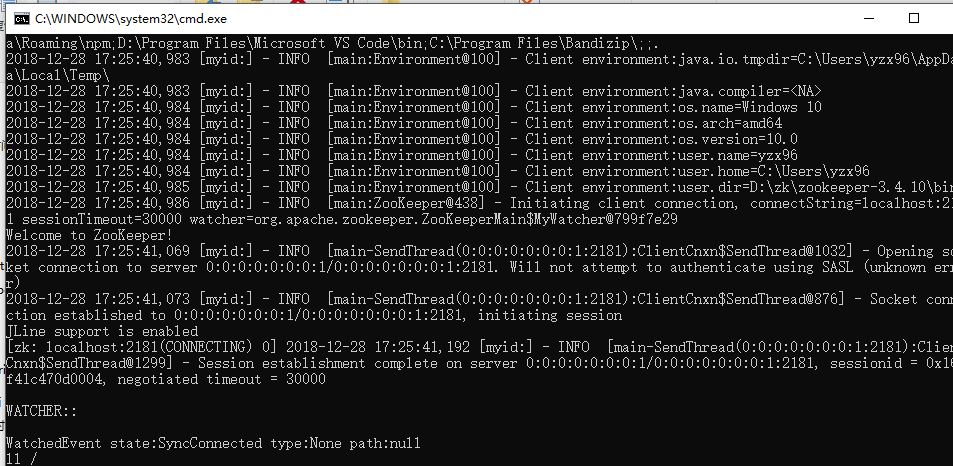
18.使用zk客户端命令查看zk节点信息 ,发现HelloService提供者和消费者都被zk记录下来,提供者正在提供,消费者正在使用。


验证服务
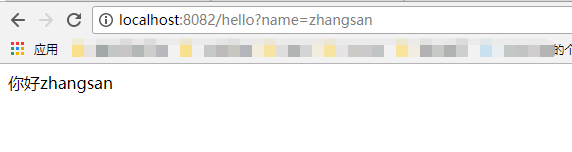
19.在浏览器输入localhost:8082/hello?name=zhangsan,服务处理返回
三、总结与下载
注意点:服务消费者的全局配置文件需要包含到注入服务的那层代码上,否则扫描到服务层会报空指针异常。
项目源码下载地址
点击我下载,小心你的鼠标,